| << Back to Project | Up to Contents | Ahead to Users Tab >> |
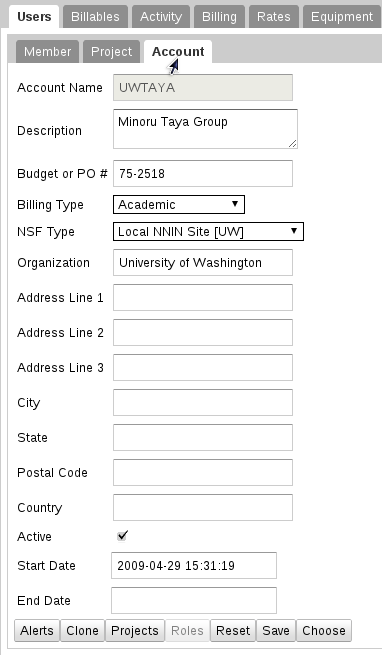
The Account panel allows the editing and creation of account records.
To select an existing account, type the account's name into the field, and select from the suggestions. To create a new account, click on the Create New Record button and fill in the new account's name. The rest of the instructions are the same between the two cases.
Most of the account fields should be self-explanatory, though some deserve special attention.
Billing Type determines the rate schedule on which the account should be billed. This is a required field.
NSF Type records the type of the institution to which this account belongs, according to NSF categorization. This is a required field.
Policy Flags affects how the account can be used and how it is handled:
At the top and bottom of the form are several buttons, with the following functions.
Marks an inactive Account active.
Opens the Activity>Alerts tab to display the account's active alerts.
This prompts for a new account name, and creates a duplicate of the account. The clone has all the same members and accounts as the original. This can be useful if an industrial user wishes to switch to a new PO number.
Marks an active Account inactive.
Shows an update log for this Account.
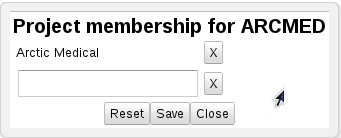
Pressing the Projects button brings up a list of the projects that can charge to this account. Projects can be deleted from the list by pressing the X button on that row; new projects can be added to the list by choosing the project in the blank at the bottom of the list.
The Reset button reloads the form with the values it had at the time of the last Save, equivalent to pressing Cancel and opening the dialog again. The Save button saves the values and closes the form, and the Cancel button closes the dialog without saving.
This discards any changes that may have been made to the form since the last Save, and reloads the information from the database. It is equivalent to pressing Cancel and selecting the same account again.
| << Back to Project | Up to Contents | Ahead to Users Tab >> |