UW CORAL Web Front End : File Transfer
Coral Network File Storage: the L:, M: and Q: drives
The Q: drive is a special network share that contains your files
when you have equipment enabled in Coral, but when you disable the
equipment, it disappears. The Q: drive has a per-user quota, so it is
not suitable for large pattern files or permanent storage of every
image you've ever pulled off of a microscope; but it should be
suitable for storing configuration data.
The M: drive is very similar, but with two important differences:
the M: drive has no user quota, so you can store as much as you like
there (within reason); but it has a two-week limit. Files on the M:
drive are silently and summarily deleted after 14
days, though the directory structure remains in place.
The L: drive, if your instrument's location has one, is identical
to the M: drive in every respect, except its connection to the
instrument will be much faster than the M: drive's. Please note
that you may have access to several different L: drives depending on
your equipment qualifications.
Files may also be uploaded to or downloaded from the L:, M: and Q:
drives via network file share or through the web, using a Coral
(UW NetID) login.
Procedure
The following procedures detail how to transfer files to and from
the M: drive, both from lab equipment and from the web. The L: and Q: drives
are very similar.
Put files onto drive M: from lab equipment
- Verify that drive M is not open, to avoid confusing error messages.
- Enable the tool in Coral.
- Copy data to drive M: (also on the desktop as Coral Member drive).
- Close drive M:, to avoid confusing error messages for the next user.
Retrieve files from a non-lab computer
Windows
- If you are off-campus, make sure that you are using Husky OnNet or a similar VPN.
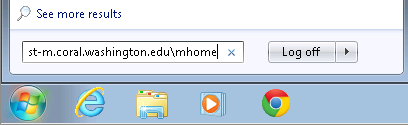
- Press ⊞R to open the Run dialog.
- In the dialog, enter the locator for the drive you wish to open (e.g., for the M drive, enter \\host-m.coral.uw.edu\mhome). You can copy-paste this locator from UW CORAL's My Profile > Files tab.
- If the authentication dialog inclues a blank for Domain, enter the literal word NETID in the Domain blank. Otherwise, enter your Username as NETID\yourUWnetid (e.g., NETID\perseant) in the Username blank.
- Copy files by dragging them out of the window.
MacOSX
- If you are off-campus, make sure that you are using Husky OnNet or a similar VPN.
- In the Finder, open the Go menu and select Connect to Server
- Under Server Address, enter the locator for the drive you wish to open (e.g., for the M: drive, enter smb://host-m.coral.uw.edu/mhome).
- Enter NETID\yourUWnetid (e.g. NETID\perseant) in the Name blank.
- Copy files by dragging them out of the window.
These shares cannot be mounted by computers on the lab network;
access on the lab network is controlled by equipment enable/disable.
It should, however, work from a notebook connected to campus wireless
or at your desk. It is not recommended to mount these shares on a
public or semi-public computer, regardless of its location.
Retrieve files from the web
- Open Coral web front-end, select Files tab.
- Follow the instructions by clicking on the link.
- If you see two red banners that read "Given config file ... does not exist", press your browser's Reload button.

- Select a file or folder you wish to download, right-click it, and select Download.
Getting files to a tool is the reverse procedure. First upload files via network file share or through the web:
Put files onto M: from a non-lab computer
Follow the same procedure given above to mount the remote file share on
your computer; then copy the files as you normally would.
Put files onto M: from the web
- Open Coral web front-end, select Files tab.
- Follow the instructions by clicking on the link.
- Press the upload button to upload a file. This can be a zip file if you like.
Copy the file(s) from M: onto lab equipment
- Verify that drive M is not open, to avoid confusing error messages.
- Enable the tool in Coral.
- Copy data from drive M: (also on the desktop as Coral Member drive).
- Close drive M:, to avoid confusing error messages for the next user.